2015年10月26日星期一

Pavtube 40% Off Spirit Halloween Coupons & Discount


Pavtube launched 40% OFF Halloween Promotion from October 21 to November 6, 2015 when users can get top Video/DVD/BD Converter for Win/Mac with the least money. 
pavtube halloween promotion,halloween special offer, halloween sale 2015 

Halloween is coming. To give you a better Halloween celebration, Pavtube holds 40% off Halloween promotion from October 21 to November 6, 2015. During the period, you can get the professional Blu-ray/DVD Ripper and Video Converter for Win/Mac with less money than any other campaign. 

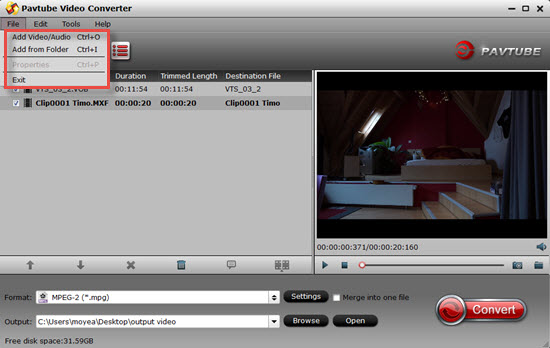
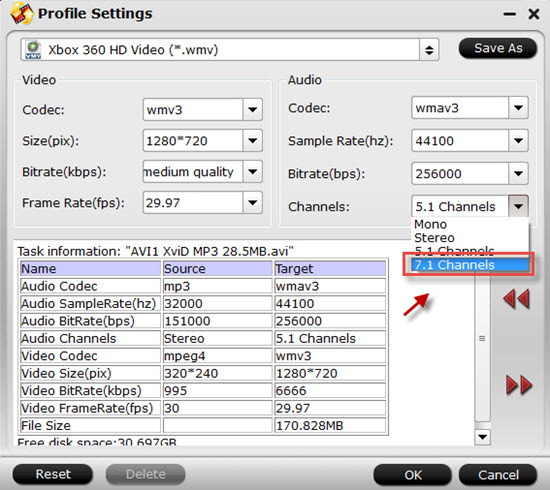
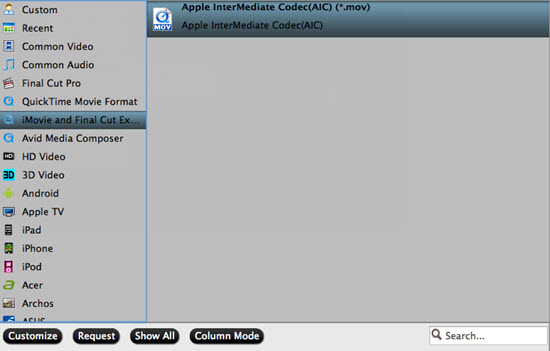
During Halloween, many people will not just watch Halloween movies but make Halloween videos by themselves. No matter Halloween movies enjoyment or Halloween video production, you probably need a video converter. For example, when you want to play your Blu-ray/DVD Halloween disc on your iPad Pro, Surface Pro 3, you can rip the disc to the device supported format with Pavtube BDMagic or Pavtube DVAid. Another case, you record the Halloween party scene and you are about to upload the camcorder video to Facebook to show your cool dressup, you’d better choose to transcode the camera video to Facebook or Vimeo accepted video with Pavtube Video Converter Ultimate. No matter what situations about video editing and producing, you can find the software you want at Pavtube Studio

Pavtube product is closed-source, not like Handbrake. But it deserves to pay for its life-long technical support and update in time to compatible with any Win/Mac system upgrade. Catch this opportunity and enjoy the best video production experience with the least money. 

The price comparison of Pavtube featured products between Halloween price and original price is as below: 
  • Pavtube Video Converter Ultimate: Original price $65, Now $52 
  • Pavtube BDMagic: Original price $49, Now $34.3 
  • Pavtube DVDAid: Original price $35, Now $21 
  • Pavtube ByteCopy: Original price $42, Now $33.6


Note: This attractive price will only be get until November 6, 2015. Please bear in mind all software programs will go back to original prices once the Halloween special offer 2015 ends. 

Time-limited. What are you waiting for? Action now!

2015年10月25日星期日

Pavtube 2015 Halloween Special Offer - Up to 40% Discount


Summary: Pavtube Studio presents big surprice for Halloween celebration with up to 40% discount on Blu-ray & DVD softwares. 

Festivals are always the best opportunities to purchase the goods you were not willing to buy or had no ability to afford in the past days. 2015 Halloween is coming. Are you ready to open your wallet? To make your Halloween celebration even greater, Pavtube Studio has prepared a great Halloween Promotion – we are offering you a generous 40% Discount on our Blu-ray & DVD Softwares (Windows 10 and El Capitan supported). 


Since Pavtube Studio offers many kinds of Blu-ray/DVD/Video softwares that you possibly don't know which one to choose, I can make a brief introduction and a recommendation to you. 

Recommendation 1: If you often do video conversion process, you can take Pavtube Video Converter Ultimate and Pavtube iMedia Converter for Mac into consideration. It can accept any Halloween movie source, like Blu-ray/DVD disc and 4K/SD/HD online/local video in any format and transform them to nearly any popular video format you have ever seen. 


Recommendation 2: For those who have plenty of Blu-ray discs, Pavtube BDMagic and Pavtube BDMagic for Mac will be the best choice. They are cheaper than the recommendation one but supply the same effect on Blu-ray/DVD Halloween movies. 


Recommendation 3: DVD owners who just need to rip and backup DVD disc or copy DVD folder, DVD ISO/IFO can focus on Pavtube DVDAid and Pavtube DVDAid for Mac. It only can deal with DVD movies but it is the cheapest item. 


Recommendation 4: Pavtube ByteCopy and Pavtube ByteCopy for Mac are for situation that your Halloween Blu-ray/DVD movies have several subtitles and audio tracks and you want to keep all the tracks and chapter markers while ripping and copying the discs. What's more, it enables you to extract FLAC/WAV audio from Blu-ray audio disc and extract SRT subtitle from Blu-ray movies. 


Think about which one is the best choice for you so that you can solve your video conversion problem with the least money. Don't waste the money-saving chance on Halloween. Just do it!

2015年10月21日星期三

Tips on Importing H.265 (HEVC) Videos to Premiere Elements


You said you have shot some H.265/HEVC footage? You must be Samsung lover I guess, right? According to the output footage H.265 you owned, Samsung NX1 4K camcorder could be your favorite ones. So the issues are coming: Editing our H.265/HEVC in some NELs such as Premiere Elements must not be easy. To tell you’re the truth, that’s the purpose we write this article. 


You may be wrong if you think H.265/HEVC videos only refused by Premiere Elements. As the new codec, H.265 is not friendly with Adobe Premiere ProAvid MC etc. Also, some changes you may need to do if you wanna enjoy H.265 movies on handle devices such as iPhone 6. What a pity is until now, these popular NELs still have no capacity of editing the H.265/HEVC codec. However, we also have the good news, some H.265 encoder/decoders can also make the job smoothly work well in Premiere Elements. 

Expand knowledge: Higher quality Smaller Size—-That’s the most important point that H.265/HEVC brings to us. 

In order to fulfill the task of importing H.265/HEVC recordings to Premiere Elements, here you are fortunately to have the Pavtube Video Converter, which is upgraded to the newest version to supportencoding/decoding the H.265/HEVC videos nicely. Naturally speaking, this H.265 encoder can easily convert our H.265 to the Premiere Elements most suitable formats, MPG, MOV or WMV. What’s more, even on the latest Mac OS X Yosemite operation, we can work it well. 

Guide: Let me show you how to convert H.265/HEVC to MPG, MOV or WMV for Premiere Elements. 
Step 1. Add your original files 
As soon as you launch the H.265 encoder/decoder, we suggest you to add your files for the first step, ‘Add video’ and ‘Add from folder’ can be your good choices. 


Step 2. Select the right output for Premiere Elements 
Open the output list through the ‘Format’ bar, then drop down the list. Nearly on the bottom of the list, choose the ‘Adobe Premier Pro/Sony Vegas’ item. Here, we can choose the ‘MOV’, ‘WMV’ or ‘MPG’ as our best. 


Step 3. Optional function: Adjust the video and audio parameters, including the Bitrate of Video & Audio, Video Size, Sample Rate, Frame Rate, Audio Channels, etc., by clicking the Settings button on the main interface for getting the best quality. 


At the end, just press on the ‘Convert’ icon on the main interface, we can smoothly get our conversion work started. If you have already owned the Pavtube Video Converter, just open the main interface and select the “Help” >>”Update” to upgrade/download to the latest version 4.8.2.0 for free. Freely import your H.265/HEVC videos to Premiere Elements, are you still worrying about that? 

More 
Convert DJI Inspire 1 4K Files to 1080p for Editing on Mac 
Transfer Sony XDCAM footage to QuickTime MOV on Mac 
Can I play Sony XDCAM EX MP4 video with QuickTime 
Watch ISO Movies in 3D With Nvidia 3D Vision 
Edit Samsung NX1 H.265 in Premiere Pro CC on Mac 
Best Canon MXF Converter : Ingest Canon MXF into FCE 
Get TiVo shows onto your Android for viewing 
Merge/Join hard drive camera recored MTS videos into one 


Src 
Tips on Importing H.265 (HEVC) Videos to Premiere Elements

2015年10月19日星期一

Comparison of Mac OS X 10.11 El Capitan and 10.10 Yosemite


Compare to the previous generations of Mac OS X 10.10 Yosemite, there are many new welcome features in 10.11 El Capitan. Fortunately, Mac users are able to upgrade to the new El Capitan for free or easily partition Mac to install both El Capitan and Yosemite for conveniently switching one to another. Following article will make a detailed comparison of El Capitan and Yostemite in many mayor aspects. 

Pavtube has upgraded with El Captian support for all its Mac Blu-ray/DVD/Video products. 


Performance in El Capitan VS Yosemite 

Apps in El Capitan will load apps up to 1.4 times faster and switching between apps will be twice as fast. Compare that to Yosemite: since its introduction many Mac users have been painfully aware of lags and slowdowns, such as stuttering animations and network connectivity issues. We experienced nothing like this in El Capitan. 

Look and feel in El Capitan vs Yosemite 

OS X El Capitan's user interface use a variation of the San Francisco font that was introduced with the Apple Watch and also features the iOS 9. San Franciso is much more Retina-friendly compared to Yosemite's use of Helvetica Neue. 

Force Touch trackpad support was introduced with Yosemite and in El Capitan there's additional setting within the Trackpad pane of System Preferences to deactivate the click noise. Referred to as Slient Clicking, this somehow doesn't compromise the degree of feedback, which is still handled via the Click slider. 

The El Capitan bar can now autohide via a setting in the General pane of System Preferences, in the same way that the Dock can dive out of the bottom of the screen in Yostemite and earlier releases of OS X. If you've used Full Screen mode in Yosemite then you'll already have experienced this feature but now it can be used all the time to gain a precious few centimeters of desktop space. 

Core tools in El Capitan vs Yosemite 

Safari: The new Safari on Mac OS X El Capitan is the perfect browser tool for your Mac device. The New Safari allows you to Pin your favorite websites, thus you can keep them opened, likewise you can mute audios without checking the tab from which the sound is coming from. The Develop menu of Safari, accessible via the Advanced pane within Safari's Preferences, now features a cool Responsive Design mode that lets you switch the web page to dimensions used on various Apple devices. 

Mail: As with Safari, feature additions in Mail within El Capitan are subtle compared to Yosemite. With the new Swipe gesture and improved full screen support, you can now optimize the way you read or manage your mails better on Mac OS X El Capitan - you can use this feature as a quick correspondence handler, and also manage your contacts and calendar much better from your inbox. With one swipe, you can mark an email as read or unread. 

Notes: Notes in El Capitan is essentially a whole new app compared to Yosemite, featuring more control over text formatting. The app is also now a share destination from within other apps, so you can send a map location straight to a new note, for example, or even a file from Finder/the desktop. The Reminders app can also receive items in this way via its own new entry on the share menu. To gain access to the new notes features, make sure upgrade your Notes iCloud database when you first run Notes on El Capitan, but doing so also makes your existing notes instantly incompatible with earlier versions of Apple's operating system. 

Maps: The enhanced Maps available on Mac OS X El Capitan provides maximum public transit information you can ever ask for, thus you will never miss your way even in a big city. You will have access to in-built public transport maps, directions and schedules. With El Capitan, you can easily plan your route with just few clicks. 

System tools in El Capitan vs Yosemite 

Spotlight: The new Spotlight window introduced in Yosemite can be moved around in El Capitan by clicking and dragging. It can also be resized to show more than a handful of results. Spotlight in El Capitan can also respond to Siri-like queries, such as "photo from last November in Germany". 

Mission control: El Capitan also comes with a full screen tweaks and mission control features. The mission control displays the names of existing apps at the top of the screen page, and this has replaced the thumbnail feature on the Yosemite. 

Disk Utility: Disk Utility has been given a visual overhaul compared to Yosemite and now features a bar graph showing how full a partition is, and what kind of files are taking up the space. 

Disk Ultility: The Disk Utility has been given a visual overhaul compared to Yosemite and now features a bar graph showing how full a partition is and what kind of files are taking up the space. Disk repartitioning within Disk Utility is now handled via a more common sense pie chart representing the entire disk, with a handle on its border that can be dragged to resize individual partitions. 

Mac users who have upgraded to the new Mac OS X 10.11 El Capitan may encounter with some video playing and editing issues since many video players or editing applications have not updated themselves with perfect support for this new OS. With Pavtube recently upgraded Mac products, you will get no problems to copy/backup 2D/3D Blu-ray/DVDdisc, convert and edit virtually any SD/HD/2K/4K video and audio formats on Mac OS X El Capitan. More Mac OS X El Capitan related articles are as below: 

More

How to Get iMovie Support Sony HDR-PJ440/B MTS Files?


One of my friends has a Sony HDR-PJ440, which is the best camcorder as he thought. He captured many videos with his PJ440 like 1080/60p AVCHD, XAVC S, and he wants to edit the AVCHD MTS recordings with iMovie thus he can share the videos with us and upload video to the website. But while he trying to import MTS clips from Sony HDR-PJ440 to iMovie, the program can’t be compatible well with these AVCHD files. 


Hot search: Canon XF200 MXF to iMovie | Phantom 3 4K MP4/MOV to iMovie | Canon EOS 5DS R MOV to iMovie 

iMovie is one of the best video editing tools for Mac. With it, you can beautify your videos simply by cutting, cropping, merging, adding effects etc. to them. It works stable on Mac computer, so it’s loved by millions of users. On the official site, it says iMovie can support DV, MPEG-4, MPEG-2, MOV and M4V file types. According to this, you are unable to import MTS to iMovie. 

As far as we know AVCHD format is a delivery codec not for editing, so it is not compatible with many editing software, such as iMovie. That is to say, iMovie doesn’t support Sony PJ440 AVCHD well, it takes much time to render. If you want to smoothly import and edit Sony HDR-PJ440/B MTS files with iMovie, you should convert Sony HDR-PJ440/B MTS to MOV format encoded with Apple InterMediate Codec, that is best supported by iMovie

Based on our testing, you can get a professional video tool like Pavtube MTS/M2TS Converter for Mac (review) to finish the conversion task. It can easily convert Sony HDR-PJ440/B MTS files to AIC MOV for iMovie on Mac OS X without quality loss. It can generate best editing format/codec for filmmakers and video enthusiasts to use in different NLE apps, such as Final Cut Pro 6/7/X, Adobe Premiere Pro CS4/CS5/CS6/CC, Adobe After Effects, Avid MC, Final Cut Express, and more. 


Other Download: 
- Pavtube old official address: http://www.pavtube.com/mts-converter-mac/ 
- Amazon Download: http://www.amazon.com/Pavtube-MTS-M2TS-Converter-Download/dp/B00QIE3U0Y 
- Cnet Download: http://download.cnet.com/Pavtube-MTS-M2TS-Converter/3000-2194_4-76177029.html 

How to work Sony HDR-PJ440/B MTS files with iMovie? 

Step 1: Drag and drop source Sony HDR-PJ440/B MTS files to the main interface. Or click “Add Video” button to import videos. 


Step 2: Set up output format for Sony HDR-PJ440/B MTS files to iMovie. From format list, choose “iMovie and Final Cut Express>>Apple InterMediate Codec (AIC) (*.mov)” for output. 


Step 3: This program offers some editing functions. You can tick “Merge into one file” under the preview window. And click “Edit” button, you can make changes to the video effects as you wish. In the editing window, you can trim your favorite part from the video, crop the frame size, adjust the visual effects, or add watermarks or subtitles. If you want to change the video parameters, go back to the main interface and click “Settings” button, you can select the video encoder, resolution, audio channel and more. This function is something worth trying. You can get the work done splendidly. 

Step 4: Press the “Convert” button to start Sony HDR-PJ440/B MTS files to AIC .mov conversion. 

Conclusion: Once finished, click “Open” to get converted videos. Then you could transfer them to iMovie for editing. 

2015年10月15日星期四

Video Tips for Handbrake on Mac OS X 10.11 El Capitan


At Times you need HandBrake Alternative software to achieve better SD/HD video and DVD/Blu-ray conversion on Mac OS X 10.11 El Capitan, and iMedia Converter for Mac is best recommended HandBrake Alternative for on Mac OS X 10.11 El Capitan. 

Read the Software review>> Pavtube Softwares Comparison | Pavtube DVDAid vs AnyDVD | ByteCopy & MakeMKV | Best Video Converter Ultimate Reviews... 

Handbrake is a open source video transcoder, which is wildly used by Mac OS users. It supports to transcode video and audio from nearly any format to MP4, MKV, AVI on iMac abd MacBook. With Handbrake, you can convert Videos, DVD, Blu-ray on Mac OS X for viewing on your iPad, iPhone, iPod touch easily. 

Following with this detailed HandBrake Mac Tutorial, you will learn how to rip DVD, Blu-ray and transcode videos on Mac OS X with Handbrake. 

Step 1: Download and Install Handbrake 

Firstly, you should download and install Handbrake for Mac on your Mac OS X. 


Note: Here, we can see that HandBrake for Mac OS X 10.6-10.10 is for 64 bit Intel. 

Step 2: Load source video to HandBrake and set Destination and Output 

Click the “Source” button on the main interface to add video, DVD or decrypted Blu-ray to the program. In the Destination section you can set the output folder by clicking Browse button. One thing you need to decide is what format (MP4, MKV, AVI, OGM) Output setting section also has 3 options you can choose: Large File Size, Web optimized and iPod 5G support. 


Note: Handbrake supports to input multiple file formats, but it can only convert them one by one, if you want to transcode many videos, please make sure you have enough time to do it. 

Step 3: Adjust video and audio settings 

You can adjust video filter, video, audio subtitles, chapters, etc to make the output videos more suitable. You should pay attention that when you select the birate, the higher bitrate you choose, the bigger size the output file will be, and the better quality you will get. 


Step 4: Start to convert video with Handbrake on Mac OS X 

Click on the Start button on the left top of Mac version HandBrake. The encoding time will depend on several variables including: the duration of the video file, the speed of your Mac computer and which Mac OS, Mac OS X Tiger, Leopard, or Mac OS X Snow Leopard. What other activity your computer is currently doing, the codec you selected (H264 or MP4). 

Conclusion of this Handbrake Tutorial for Mac: 

This is basic HandBrake Tutorial for Mac OS X users, for details explanation, you need to cast an eye on HandBrake official site. And as a free transcoding software, you may come across with unexpected issues when using HandBrake on your Mac from time to time. Handbrake has some limitations. For instance, it can load multiple video and copy protected DVD, but it does not support the encrypted Blu-ray disc. It only can be used to transcode a Blu-ray disc that the protection is first removed using a third party application. It does not support batch conversion and shut-down automatically after conversion. And the most severe problem is HandBrake just supports Mac OS X 10.6 - 10.10. The newest Mac OS X 10.11 El Capitan system is not supported by HandBrake. 

Therefore, it is better to find some HandBrake Mac version Alternative software to fill all the limitations that Handbrake lacks, such as backing up encryption Blu-rayripping DVD to iTunes, copying Blu-ray andDVD on Mac OS X El Capitan. Pavtube iMedia Converter for Mac is the recommended HandBrake Alternative. It is all in one solution for you to convert SD/HD videoS, rip DVD/Blu-ray to various formats on Mac OS X from 10.6 to 10.11 El Capitan. You can use the batch conversion functions to transcoding multiple files at a time. The versatile and distinctive editing functions can help you create elegant videos. 

Free download and install 


Other Download: 
- Pavtube old official address: http://www.pavtube.cn/imedia-converter-mac/ 
- Cnet Download: http://download.cnet.com/Pavtube-iMedia-Converter/3000-2194_4-76177788.html 

How to use HandBrake Mac Alternative on Mac OS X El Capitan? 

Step 1. Load your Blu-ray 

Run Pavtube iMedia Converter for Mac on Mac OS X El Capitan, load your Blu-ray disc, folder, ISO image files by clicking the "File" icon. 


Step 2. Choose target format 

Click the format bar to choose "HD Video" and "H.264 HD Video (*.mp4)". 


Step 3. Start conversion 

After everything is OK, click the big button "Convert" to start conversion on Mac OS X El Capitan. After conversion, you'll get your desired MP4 movie in output folder. 

That is easy to use HandBrake Mac Alternative to convert videos on Mac OS X El Capitan. Just try. 

If want more detailed video conversion steps, read this article: How to Convert Videos on Mac OS X El Capitan with Pavtube iMedia Converter for Mac? 

Read More: 

Good News! To thanks for your continuous support, Pavtube Official Website and Pavtube Facebook are now holding the biggest sale for this summer with fantastic 50% off discounts and giveaway. Pay less to get powerful Blu-ray/DVD/Video Converter to build your own home media center on this summer! 

Giveaway: First Five customers can share this post, email us your order numer and the snapshot to win one more FREE license, no product limit! 

Related Article: 


Src 
HandBrake Mac Tutorial on Mac OS X 10.11 El Capitan 

2015年10月14日星期三

Will the Xbox One/360 receive H.265 4K support? Not Yet!


“Would it be possible for Microsoft to release a software update that would give the Xbox One the capability to play HEVC (H.265) 4K video, or would I have to wait for the ninth generation of video game consoles to be able to do that?” – From answers.microsoft.com


4K resolution is widely predicted to be the main development trend of video resolution, which is on the way to all of us. While, High Efficiency Video Coding is the latest video compression standard that promises to deliver visual quality equivalent to H.264 with up to 50% bitrate savings (H.265 vs H.264). In most cases, to get higher video quality and definition for playback via Xbox One/Xbox 360. 

I would love the ability of being able to play H.265 encoded media through my Xbox One. Do you have the similar ideas? Fine, according to the Xbox’s supported formats limitation, it seems a little important to find some H.265/HEVC to Xbox converters to solve the issues, right? 

Fortunately, you can depend on Pavtube Video Converter since Xbox One/Xbox 360 is included in its output. Why we called this program as the Xbox video converter? Because it can convert those Xbox unsupported video formats for playback smoothly.


Steps on How to play H.265 4K videos on Xbox One/Xbox 360

Step 1: Add H.265 videos to the H.265 to Xbox converter

Download, install and launch the Xbox Video Converter. When the main interface pops up, you can see some buttons also with a preview window on the right. Click “Add video” button to load your H.265 4K videos or directly drag the footage to the program. If you want to load H.265 4K files at once, you can click “Add from folder” to meet your needs. You should wait a little longer if you got large files.


Step 2: Choose output format

Go to the format bar to select the “Zune/Xbox 360 Device -> Xbox 360 HD Video (*.wmv)” as your output format. From H.265/HEVC to HD WMV, that’s the key to play H.265 movies on Xbox.


Step 3: Custom Video or Audio Settings for Xbox One/360

If the default A/V settings cannot fit your needs, you can click “Settings” button to custom the output video and audio settings by yourself. But if you are not good at it, you’d better use the default parameters, they will ensure you a good balance between file size and image quality basically.


Step 4: Convert H.265 4K video for Xbox One/360

The built-in editing function provided by H.265 to Xbox Video Converter is something worth trying. To trim the video, add artistic effects, adjust audio, add watermark, customize video parameters and so on. You can get the work done splendidly. Of course, if you don’t think it’s a necessary to do, you can skip it and move onto the next step directly.

Step 5: Press the “Convert” button on the bottom-right corner of this H.265/HEVC to Xbox One Video Converter to start performing video conversion.

Now, you can see the conversion progress. And the conversion speed is mainly affected by the size of files that you’re converting and your computer’s performance. Once the conversion process shows in 100%, click “Open” to get the output videos. In addition, check “Shut down computer after conversion” and you can go away without keeping an eye on it.

Tips:

1. For Mac users, Pavtube Video Converter for Mac can run on Mac OS X 10.10 Yosemite system smoothly.

2. Maybe you are a newbie to this Xbox One or Xbox 360, how to stream files into Xbox 360 or Xbox One may shed some light on your using progress.Further Reading:
More 

How to Watch ISO Movies in 3D With Nvidia 3D Vision 
How-To: Get TiVo shows onto your Android for on-the-go viewing 
H.265 to PPro: Edit Samsung NX1 H.265 in Premiere Pro CC on Mac Yosemite 
Best Canon MXF Converter : Ingest Canon MXF into FCE 
Convert DJI Inspire 1 4K Files to 1080p for Editing on Mac/PC 
Convert and Transfer Sony XDCAM footage to QuickTime MOV on Mac 
Can I play Sony XDCAM EX MP4 video with QuickTime 
Merge/Join hard drive camera recored MTS videos into one with no conversion 

Src 

How to Play H.265 4K Videos on Xbox One/Xbox 360?

Is it possible to import Zenmuse X5 and X5R 4K videos to iMovie?


DJI recently announced their new ZENMUSE X5 and ZENMUSE X5R of Micro Four Thirds Cameras for the Inspire 1 drone system. Featuring increased dynamic range, interchangeable lens compatibility, remote focus and aperture control, and lossless RAW 4K video recording, the ZENMUSE X5 series is ready to take on the high-performance world of aerial photography with two distinct models. 


After recording 4K video footage with the two aerial cameras, you may wish to polish the video with some NLE editing program such as iMovie on Mac. But iMovie doesn’t read 4K video with H.265/4K MXF/RAW/XAVC codec perfectly, you may encounter video disordered, picture stunning and some other problems. What should we do to edit Zenmuse X5 X5R 4k video in iMovie smoothly? 

The easiest workaround is to convert Zenmuse X5 and X5R 4K footage to a more editing-friendly format, such Apple InterMediate Codec for iMovie. The process is surprisingly easy and can be done with the help of Pavtube 4K Video Converter for Mac. The program lets you convert Zenmuse X5 X5R 4k video to AIC encoded MOV, which ensures maximum editing quality and efficiency when importing videos to iMovie (no matter iMovie HD, iMovie 08, iMovie 09, or iMovie 11) in a few clicks.


Other Download:


Transcode Zenmuse X5/X5R 4k video to AIC for iMovie on Mac 

Step 1. Add your raw Zenmuse X5/X5R 4K videos 

Run the program you just set up. Drag and drop Zenmuse X5/X5R 4K video files to the converter. You can also hit “Add video” and “Add from folder” buttons to import videos to the app. If you wanna combine several videos into one file, you can click the “Merge into one” beside the preview window. 


Step 2: Choose the right one for iMovie 

Follow my steps to come to the output list, here we can find the suitable one for iMovie. As we mentioned above, we can select the “Apple InterMediate Codec (*.mov)” from the “iMovie/Final Cut Express” item. 


Step 3. Adjust settings (Optional) 

Before conversion, you can click the “Settings” icon to customize the video/audio settings including the Bitrate of Video and Audio, Audio, Video Size, Sample Rate, Frame Rate, Audio Channels, etc for iMovie. Such a nice functional feature we cannot miss it! 

Step 4. Start conversion 

In the end, when you finish the preparation work it’s time to hit the “Convert” to get our work ended. After the conversion, click “Open” to locate the result videos and then launch iMovie, choose “File > Import > Movies…”, to import the converted 4K video into iMovie; prepare for editing. You will find that it’s just a piece of cake to edit Panasonic Zenmuse X5/X5R 4K files in iMovie. 

More 

How to Watch ISO Movies in 3D With Nvidia 3D Vision 
How-To: Get TiVo shows onto your Android for on-the-go viewing 
H.265 to PPro: Edit Samsung NX1 H.265 in Premiere Pro CC on Mac Yosemite 
Best Canon MXF Converter : Ingest Canon MXF into FCE 
Convert DJI Inspire 1 4K Files to 1080p for Editing on Mac/PC 
Convert and Transfer Sony XDCAM footage to QuickTime MOV on Mac 
Can I play Sony XDCAM EX MP4 video with QuickTime 
Merge/Join hard drive camera recored MTS videos into one with no conversion 

Src 

Import Zenmuse X5 and X5R 4K videos to iMovie on Mac 

Upgrade! Pavtube Mac Now Support El Capitan


The newly arrived Mac OS X El Capitan featuring the ability to run multiple apps is fantastic. But people are out of luck to entertain themselves with various media files on the new operating system since most Mac video conversion application are not updated with support for El Capitan. To get all those issues fixed up, Pavtube Studio 
Pavtube Sutio has recently updated all its Mac Blu-ray/DVD/Video products with perfect support for Mac’s new operating system - Mac OS X El Capitan. Products that works compatible well with El Capitan including: Pavtube Video Converter for MacPavtube HD Video Converter for MacPavtube MTS/M2TS Converter for MacPavtube MXF Converter for MacPavtube iMixMXFPavtube BDMagic for MacPavtube ByteCopy for MacPavtube DVDAid for MacPavtube iMedia Converter for Mac


Copy/Backup Blu-ray/DVD on El Capitan 
Have problem to copy/backup Blu-ray/DVD disc on Mac OS X El Capitan, never mind, with Pavtube newly upgraded Blu-ray/DVD products, you will get no difficulty to make a full disc copy or the main movie copy of the original 2D/3D Blu-ray/DVD disc on Mac OS X El Capitan. Besides that, the program also enables you to rip/convert Blu-ray/DVD disc to various different file formats on El Capitan platform for playing on iPhone/iPad/iPod, Android phone and tablets, Windows phones or tablets, game consoles, HD media players, streaming to Apple TV/Amazon Fire TV/Roku, etc. 

Play and edit videos on El Capitan 
Play and edit any video files on Mac OS X El Capitan can also be easily achieved with Pavtube upgraded Mac Video Converter applications. You can effectively convert virtually any file formats including AVI, WMV, MP4, MOV, FLV, VOB, MKV, MKV, MTS, M2TS, Tivo, H.265 in SD, HD, 2K, 4K videos to your desired file formats or devices and programs optimized file formats for better viewing. For camera and camcorder users, you will have a fast and fluid workflow on Mac OS X El Capitan with our program by exporting professional video editing codec such as Apple Prores Codec for Final Cut Pro 6/7/x, Apple Intermediate Codec(AIC) for iMovie/Final Cut Express, DNxHD MOV for Avid Media Composer, After Effects CC/Adobe Premiere Pro/Adobe Premiere Elements/Sony Vegas specially optimized file formats, etc. 

Other downloads: 

BDMagic for Mac 
- Pavtube old official address: http://www.pavtube.cn/blu-ray-ripper-mac/ 
- Cnet Download: http://download.cnet.com/Pavtube-BDMagic/3000-7970_4-76177782.html 

ByteCopy for Mac 
- Pavtube old official address: http://www.pavtube.cn/bytecopy-mac/ 
- Cnet Download: http://download.cnet.com/Pavtube-ByteCopy/3000-7970_4-76177783.html 

iMedia Converter for Mac 
- Pavtube old official address: http://www.pavtube.cn/imedia-converter-mac/ 
- Cnet Download: http://download.cnet.com/Pavtube-iMedia-Converter/3000-2194_4-76177788.html 

Video Converter for Mac 
- Pavtube old official address: http://www.pavtube.com/video-converter-mac/ 
- Amazon Store Download: http://www.amazon.com/Pavtube-Video-Converter-Mac-Download/dp/B00QIBK0TQ 
- Cnet Download: http://download.cnet.com/Pavtube-Video-Converter/3000-2194_4-76179460.html 

HD Video Converter for Mac 
- Pavtube old official address: http://www.pavtube.com/hd-video-converter-mac/ 
- Amazon Store Download: http://www.amazon.com/Pavtube-Video-Converter-Mac-Download/dp/B00QI9GNZS 
- AppStore Download: https://itunes.apple.com/de/app/pavtube-hd-video-converter/id502792488?mt=12 
- Cnet Download: http://download.cnet.com/Pavtube-HD-Video-Converter/3000-2194_4-76177786.html 

MTS/M2TS Converter for Mac 
- Pavtube old official address: http://www.pavtube.com/mts-converter-mac/ 
- Amazon Download: http://www.amazon.com/Pavtube-MTS-M2TS-Converter-Download/dp/B00QIE3U0Y 
- Cnet Download: http://download.cnet.com/Pavtube-MTS-M2TS-Converter/3000-2194_4-76177029.html 

MXF Converter for Mac 
- Pavtube old official address: http://www.pavtube.com/mxf-converter-mac/ 
- AppStore Download: https://itunes.apple.com/us/app/pavtube-mxf-converter/id502807634?mt=12 
- Amazon Download: http://www.amazon.com/Pavtube-MXF-Converter-Mac-Download/dp/B00QID8K28 
- Cnet Download: http://download.cnet.com/Pavtube-MXF-Converter/3000-2194_4-76177789.html 

iMixMXF 
- Pavtube old official address: http://www.pavtube.com/imixmxf-mac/ 
- Amazon Download: http://www.amazon.com/Pavtube-Studio-iMixMXF-Download/dp/B00QI7MY4Y 
- Cnet Download: http://download.cnet.com/Pavtube-iMixMXF/3000-2194_4-76171460.html 

Further Reading: 

2015年10月12日星期一

Load Video Recording by Sony PXW-FS5 4K XAVC to Premiere Pro CC on Mac for editing


Summary: Due to the Video Recording by Sony PXW-FS5 4K XAVC can’t uploading to Premiere Pro CC on Mac for editing? here we give some simple tips to solve this unhappy things. 

Hot SearchCompress 4K Videos to 1080p | 4K Videos to Apple TV | PXW-FS5 4K XAVC to FCP X 

“I have captured some videos clips about 20 or so with my new Sony PXW-FS5, the recordings are in XAVC format with 4K resolution. I would like to uploading them to Premiere Pro CC on Mac for editing. But the problem is, there is a pop-up window indicate that the video format may not supported right now, I want to find some apps can import the Sony PXW-FS5 4K XAVC/AVCHD to Premiere Pro CC. Can anyone suggest something to help me out?” 

As for Sony PXW-FS5, here is a closer look at the frame rates and resolutions: 


Recording from above, the video format recorded by Sony PXW-FS5 are not supported by Premiere Pro CC. We should make video formats most suitable for uploading to Premiere Pro CC with best effects. Here I recommend you a professional software to handle this issue–Pavtube HD Video Converter for Mac, It can easily make the video recording by Sony PXW-FS5 converted to Premiere Pro CC suitable format like the common .mpg-2 format. 


Other Download: 
- Pavtube old official address: http://www.pavtube.com/hd-video-converter-mac/ 
- Amazon Store Download: http://www.amazon.com/Pavtube-Video-Converter-Mac-Download/dp/B00QI9GNZS 
- AppStore Download: https://itunes.apple.com/de/app/pavtube-hd-video-converter/id502792488?mt=12 
- Cnet Download: http://download.cnet.com/Pavtube-HD-Video-Converter/3000-2194_4-76177786.html 

Load Video Recording by Sony PXW-FS5 4K XAVC to Premiere Pro CC on Mac for editing 

Step 1: Transfer Sony PXW-FS5 4K XAVC/AVCHD video footage to Mac hard drive. 

The Sony PXW-FS5 camera store recorded H.265 video on external SD card, you can remove the card out of your camera and insert the SD card into an SD card reader and then connect the card reader to your computer. The card reader will appear on your Mac desktop, double click on the card reader icon and a window will open to show all the files stored on the card. 

Step 2: Import Sony PXW-FS5 4K XAVC/AVCHD files. 

Start and open the program on your Mac computer, from “File” menu drop-down options, select “Add Video/Audio” or “Add from folder” to import your source camera files to the computer. 


Step 3: Select Adobe Premiere Pro CC optimized output file format. 

Click “Format” drop-down bar, from its extended list, select “Adobe Premiere/Son…” > “MPEG-2 (*.mpg)” as the output file format, you can also select to output Adobe Premiere Pro WMV or MOV file format according to your own preference. 


Step 4: Convert Sony PXW-FS5 4K XAVC/AVCHD to Premiere Pro CC MPEG-2. 

Go back to the main interface, tap the right-bottom “Convert” button to start the Sony PXW-FS5 4K XAVC/AVCHD video to Adobe Premiere Pro conversion process. 

When the conversion is completed, import converted media files to Adobe Premiere Pro CC for further professional post-production with no limitation.