Pavtube launched 40% OFF Halloween Promotion from October 21 to November 6, 2015 when users can get top Video/DVD/BD Converter for Win/Mac with the least money. pavtube halloween promotion,halloween special offer, halloween sale 2015 Halloween is coming. To give you a better Halloween celebration, Pavtube holds 40% off Halloween promotion from October 21 to November 6, 2015. During the period, you can get the professional Blu-ray/DVD Ripper and Video Converter for Win/Mac with less money than any other campaign. During Halloween, many people will not just watch Halloween movies but make Halloween videos by themselves. No matter Halloween movies enjoyment or Halloween video production, you probably need a video converter. For example, when you want to play your Blu-ray/DVD Halloween disc on your iPad Pro, Surface Pro 3, you can rip the disc to the device supported format with Pavtube BDMagic or Pavtube DVAid. Another case, you record the Halloween party scene and you are about to upload the camcorder video to Facebook to show your cool dressup, you’d better choose to transcode the camera video to Facebook or Vimeo accepted video with Pavtube Video Converter Ultimate. No matter what situations about video editing and producing, you can find the software you want at Pavtube Studio. Pavtube product is closed-source, not like Handbrake. But it deserves to pay for its life-long technical support and update in time to compatible with any Win/Mac system upgrade. Catch this opportunity and enjoy the best video production experience with the least money. The price comparison of Pavtube featured products between Halloween price and original price is as below:
- Pavtube Video Converter Ultimate: Original price $65, Now $52
- Pavtube BDMagic: Original price $49, Now $34.3
- Pavtube DVDAid: Original price $35, Now $21
- Pavtube ByteCopy: Original price $42, Now $33.6
Note: This attractive price will only be get until November 6, 2015. Please bear in mind all software programs will go back to original prices once the Halloween special offer 2015 ends. Time-limited. What are you waiting for? Action now!
You said you have shot some H.265/HEVC footage? You must be Samsung lover I guess, right? According to the output footage H.265 you owned, Samsung NX1 4K camcorder could be your favorite ones. So the issues are coming: Editing our H.265/HEVC in some NELs such as Premiere Elements must not be easy. To tell you’re the truth, that’s the purpose we write this article.  You may be wrong if you think H.265/HEVC videos only refused by Premiere Elements. As the new codec, H.265 is not friendly with Adobe Premiere Pro, Avid MC etc. Also, some changes you may need to do if you wanna enjoy H.265 movies on handle devices such as iPhone 6. What a pity is until now, these popular NELs still have no capacity of editing the H.265/HEVC codec. However, we also have the good news, some H.265 encoder/decoders can also make the job smoothly work well in Premiere Elements. Expand knowledge: Higher quality Smaller Size—-That’s the most important point that H.265/HEVC brings to us. In order to fulfill the task of importing H.265/HEVC recordings to Premiere Elements, here you are fortunately to have the Pavtube Video Converter, which is upgraded to the newest version to supportencoding/decoding the H.265/HEVC videos nicely. Naturally speaking, this H.265 encoder can easily convert our H.265 to the Premiere Elements most suitable formats, MPG, MOV or WMV. What’s more, even on the latest Mac OS X Yosemite operation, we can work it well. Guide: Let me show you how to convert H.265/HEVC to MPG, MOV or WMV for Premiere Elements. Step 1. Add your original files As soon as you launch the H.265 encoder/decoder, we suggest you to add your files for the first step, ‘Add video’ and ‘Add from folder’ can be your good choices.
  Step 2. Select the right output for Premiere Elements Open the output list through the ‘Format’ bar, then drop down the list. Nearly on the bottom of the list, choose the ‘Adobe Premier Pro/Sony Vegas’ item. Here, we can choose the ‘MOV’, ‘WMV’ or ‘MPG’ as our best.
  Step 3. Optional function: Adjust the video and audio parameters, including the Bitrate of Video & Audio, Video Size, Sample Rate, Frame Rate, Audio Channels, etc., by clicking the Settings button on the main interface for getting the best quality. At the end, just press on the ‘Convert’ icon on the main interface, we can smoothly get our conversion work started. If you have already owned the Pavtube Video Converter, just open the main interface and select the “Help” >>”Update” to upgrade/download to the latest version 4.8.2.0 for free. Freely import your H.265/HEVC videos to Premiere Elements, are you still worrying about that? More Convert DJI Inspire 1 4K Files to 1080p for Editing on Mac Transfer Sony XDCAM footage to QuickTime MOV on Mac Can I play Sony XDCAM EX MP4 video with QuickTime Watch ISO Movies in 3D With Nvidia 3D Vision Edit Samsung NX1 H.265 in Premiere Pro CC on Mac Best Canon MXF Converter : Ingest Canon MXF into FCE Get TiVo shows onto your Android for viewing Merge/Join hard drive camera recored MTS videos into one Src Tips on Importing H.265 (HEVC) Videos to Premiere Elements
Compare to the previous generations of Mac OS X 10.10 Yosemite, there are many new welcome features in 10.11 El Capitan. Fortunately, Mac users are able to upgrade to the new El Capitan for free or easily partition Mac to install both El Capitan and Yosemite for conveniently switching one to another. Following article will make a detailed comparison of El Capitan and Yostemite in many mayor aspects. Pavtube has upgraded with El Captian support for all its Mac Blu-ray/DVD/Video products. 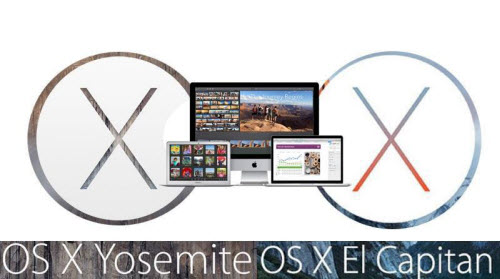 Performance in El Capitan VS Yosemite Apps in El Capitan will load apps up to 1.4 times faster and switching between apps will be twice as fast. Compare that to Yosemite: since its introduction many Mac users have been painfully aware of lags and slowdowns, such as stuttering animations and network connectivity issues. We experienced nothing like this in El Capitan. Look and feel in El Capitan vs Yosemite OS X El Capitan's user interface use a variation of the San Francisco font that was introduced with the Apple Watch and also features the iOS 9. San Franciso is much more Retina-friendly compared to Yosemite's use of Helvetica Neue. Force Touch trackpad support was introduced with Yosemite and in El Capitan there's additional setting within the Trackpad pane of System Preferences to deactivate the click noise. Referred to as Slient Clicking, this somehow doesn't compromise the degree of feedback, which is still handled via the Click slider. The El Capitan bar can now autohide via a setting in the General pane of System Preferences, in the same way that the Dock can dive out of the bottom of the screen in Yostemite and earlier releases of OS X. If you've used Full Screen mode in Yosemite then you'll already have experienced this feature but now it can be used all the time to gain a precious few centimeters of desktop space. Core tools in El Capitan vs Yosemite Safari: The new Safari on Mac OS X El Capitan is the perfect browser tool for your Mac device. The New Safari allows you to Pin your favorite websites, thus you can keep them opened, likewise you can mute audios without checking the tab from which the sound is coming from. The Develop menu of Safari, accessible via the Advanced pane within Safari's Preferences, now features a cool Responsive Design mode that lets you switch the web page to dimensions used on various Apple devices. Mail: As with Safari, feature additions in Mail within El Capitan are subtle compared to Yosemite. With the new Swipe gesture and improved full screen support, you can now optimize the way you read or manage your mails better on Mac OS X El Capitan - you can use this feature as a quick correspondence handler, and also manage your contacts and calendar much better from your inbox. With one swipe, you can mark an email as read or unread. Notes: Notes in El Capitan is essentially a whole new app compared to Yosemite, featuring more control over text formatting. The app is also now a share destination from within other apps, so you can send a map location straight to a new note, for example, or even a file from Finder/the desktop. The Reminders app can also receive items in this way via its own new entry on the share menu. To gain access to the new notes features, make sure upgrade your Notes iCloud database when you first run Notes on El Capitan, but doing so also makes your existing notes instantly incompatible with earlier versions of Apple's operating system. Maps: The enhanced Maps available on Mac OS X El Capitan provides maximum public transit information you can ever ask for, thus you will never miss your way even in a big city. You will have access to in-built public transport maps, directions and schedules. With El Capitan, you can easily plan your route with just few clicks. System tools in El Capitan vs Yosemite Spotlight: The new Spotlight window introduced in Yosemite can be moved around in El Capitan by clicking and dragging. It can also be resized to show more than a handful of results. Spotlight in El Capitan can also respond to Siri-like queries, such as "photo from last November in Germany". Mission control: El Capitan also comes with a full screen tweaks and mission control features. The mission control displays the names of existing apps at the top of the screen page, and this has replaced the thumbnail feature on the Yosemite. Disk Utility: Disk Utility has been given a visual overhaul compared to Yosemite and now features a bar graph showing how full a partition is, and what kind of files are taking up the space. Disk Ultility: The Disk Utility has been given a visual overhaul compared to Yosemite and now features a bar graph showing how full a partition is and what kind of files are taking up the space. Disk repartitioning within Disk Utility is now handled via a more common sense pie chart representing the entire disk, with a handle on its border that can be dragged to resize individual partitions. Mac users who have upgraded to the new Mac OS X 10.11 El Capitan may encounter with some video playing and editing issues since many video players or editing applications have not updated themselves with perfect support for this new OS. With Pavtube recently upgraded Mac products, you will get no problems to copy/backup 2D/3D Blu-ray/DVDdisc, convert and edit virtually any SD/HD/2K/4K video and audio formats on Mac OS X El Capitan. More Mac OS X El Capitan related articles are as below:
More
One of my friends has a Sony HDR-PJ440, which is the best camcorder as he thought. He captured many videos with his PJ440 like 1080/60p AVCHD, XAVC S, and he wants to edit the AVCHD MTS recordings with iMovie thus he can share the videos with us and upload video to the website. But while he trying to import MTS clips from Sony HDR-PJ440 to iMovie, the program can’t be compatible well with these AVCHD files.  Hot search: Canon XF200 MXF to iMovie | Phantom 3 4K MP4/MOV to iMovie | Canon EOS 5DS R MOV to iMovie iMovie is one of the best video editing tools for Mac. With it, you can beautify your videos simply by cutting, cropping, merging, adding effects etc. to them. It works stable on Mac computer, so it’s loved by millions of users. On the official site, it says iMovie can support DV, MPEG-4, MPEG-2, MOV and M4V file types. According to this, you are unable to import MTS to iMovie. As far as we know AVCHD format is a delivery codec not for editing, so it is not compatible with many editing software, such as iMovie. That is to say, iMovie doesn’t support Sony PJ440 AVCHD well, it takes much time to render. If you want to smoothly import and edit Sony HDR-PJ440/B MTS files with iMovie, you should convert Sony HDR-PJ440/B MTS to MOV format encoded with Apple InterMediate Codec, that is best supported by iMovie. Based on our testing, you can get a professional video tool like Pavtube MTS/M2TS Converter for Mac (review) to finish the conversion task. It can easily convert Sony HDR-PJ440/B MTS files to AIC MOV for iMovie on Mac OS X without quality loss. It can generate best editing format/codec for filmmakers and video enthusiasts to use in different NLE apps, such as Final Cut Pro 6/7/X, Adobe Premiere Pro CS4/CS5/CS6/CC, Adobe After Effects, Avid MC, Final Cut Express, and more.
 Other Download: - Pavtube old official address: http://www.pavtube.com/mts-converter-mac/ - Amazon Download: http://www.amazon.com/Pavtube-MTS-M2TS-Converter-Download/dp/B00QIE3U0Y - Cnet Download: http://download.cnet.com/Pavtube-MTS-M2TS-Converter/3000-2194_4-76177029.html How to work Sony HDR-PJ440/B MTS files with iMovie? Step 1: Drag and drop source Sony HDR-PJ440/B MTS files to the main interface. Or click “Add Video” button to import videos.
  Step 2: Set up output format for Sony HDR-PJ440/B MTS files to iMovie. From format list, choose “iMovie and Final Cut Express>>Apple InterMediate Codec (AIC) (*.mov)” for output.
  Step 3: This program offers some editing functions. You can tick “Merge into one file” under the preview window. And click “Edit” button, you can make changes to the video effects as you wish. In the editing window, you can trim your favorite part from the video, crop the frame size, adjust the visual effects, or add watermarks or subtitles. If you want to change the video parameters, go back to the main interface and click “Settings” button, you can select the video encoder, resolution, audio channel and more. This function is something worth trying. You can get the work done splendidly. Step 4: Press the “Convert” button to start Sony HDR-PJ440/B MTS files to AIC .mov conversion. Conclusion: Once finished, click “Open” to get converted videos. Then you could transfer them to iMovie for editing.